The Dashboard
Loading a Configuration
Once you have created a configuration, you can load it from the main Photodash administration page. Alternatively, you can copy the link for a particular load button, and you can use it on a tablet to link directly to the configuration (for example, as the default URL in a kiosk browser). The direct link is in the format http://photodashURL/configurationName.
It's easiest to go through the initial configuration phase on a desktop, and then load the actual dashboard on the tablet.
Clock and Weather
Your loaded configuration will always have a clock in the upper-left with the current date and time. In the upper-right, if you configured a weather entity, the current weather conditions will display. Tapping on the weather conditions will cause the three-day forecast to appear, and tapping again will dismiss the forecast (or it will automatically dismiss after 30 seconds of inactivity).
Views
Once you have configured views (see below), tapping anywhere on the screen will display icons on the bottom of the screen for each view. Tapping an icon will bring up the tiles for that view. Any selected view, and the menu, will disappear after 30 seconds of inactivity.
Navigation Bar
Swiping down anywhere on the screen will reveal the Photodash navigation bar, and swiping up will dismiss it.
Protecting these features with a PIN code is currently on the roadmap, but not yet implemented. For the moment, note that anyone with physical access to your device can swipe down and access these settings.

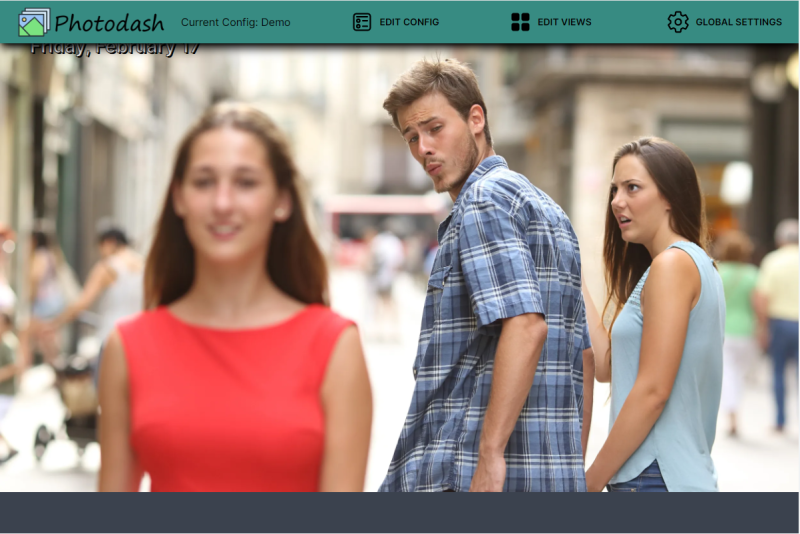
This navigation bar looks a little different than the one in the administration area. We can now see the name of the currently loaded config, as well as several options:
Edit Config will take you to the configuration page that allows you to change the weather entity, background music, and photo slideshow configuration.
Edit Views will allow you to add and modify views on this dashboard (see below for more details).
Global Settings will take you back to the onboarding settings.
Editing Views
After tapping edit views, you should see something similar to the following at the bottom of the screen:

The three icons in gray are existing views. If you're just setting up Photodash for the first time, you won't see those. The green plus-sign icon allows you to add a new view, and the blue button with arrows brings up a popup that allows you to change the order of existing views by tapping and dragging.
Adding a View

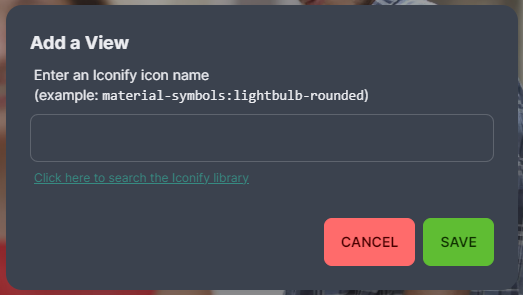
There's only one thing to specify when adding a view, and that is the icon. Photodash uses Iconify, which offers a vast library of over 100,000 open source icons from over 100 icon sets. You can click the search link to find the icon you are looking for, and then paste it into the box to create your view.
Editing View Icon or Deleting a View
When you're in edit mode, press and hold the icon for an existing view to display a popup that will allow you to edit the icon for an existing view. You can also delete the view from that popup.
Working with Tiles
Tap a view icon to select that view for editing. Each view is an empty grid that can be filled up with tiles of various types. The number of rows in the grid is dependent on the height of your screen, as rows are configured to be 70 pixels high.
Because the number of rows is set based on screen height, you will want to create and modify views on the actual device you are displaying Photodash on. Alternatively, if you are comfortable with the developer tools in your computer's browser, you can simulate a device with the same screen size as your tablet or phone. If you attempt to configure Photodash views on a device with a different screen resolution as the device you will be using it on, results will be unpredictable and tiles you have added might not display.
Adding a Tile
Tap the "Add a Tile" button in the lower left to bring up the options for adding a new tile. You'll first select the type of tile you want to add and then fill out the details. Each tile has varying options and requirements to configure it. Full details of each tile are available in the tile reference. When you add a tile, it will be automatically placed in the first available open space Photodash finds in the grid.
Moving and Resizing Tiles
Tiles can be held down and dragged to move them around on screen. You can also use the handle in the lower right corner to resize a tile.
Editing and Deleting Tiles
Press and hold a tile to bring up its configuration. You can also delete the tile from there.
Saving Changes
Any time a change has been made, the Save Changes button will appear in the lower left. Click there to save your tile changes.
Changes to the view menu at the bottom of the screen save instantly (adding a view, changing a view icon, reordering views, deleting a view), but changes involving tiles currently do not autosave.
If you change a view, you must click the save button while on that view. If you switch to another view while still in edit mode, and then click save, only the changes to the active view are saved. This will be improved prior to the 1.0 release.